

Home
About Us
Allotments
Garden Equipment
Seed Suppliers
Manure Problems
Children's Pages
GLA Blog
Weather Blog
School Veg Patch
Useful Links
Growing lavender and taking cuttings
I don’t claim that this is the only way to take lavender cuttings - some people will advocate taking soft wood cuttings but this is the way that has always worked for me.
We use lavender as edging around a couple of our fruit beds. The bees and butterflies love it! The fruit bushes need to have been pollinated before the lavender flowers so in a way the masses of lavender are our big thank you to the pollinating insects.
I took my cuttings in August after the lavender had flowered. As this is the time when I trim the edging it’s a good time to select cutting material. If possible try to use sprigs of lavender that have not flowered if not I trim off any old flower stalks.
As my lavender is on the plot I either harvest some suitable cuttings material and pop it in a plastic freezer bag which is sealed and taken home or I take pots of compost to yje plot nd take the cuttings there.
Before preparing the cuttings I mixed half multi-purpose compost with half grit or perlite. Lavender cuttings need to be well drained.
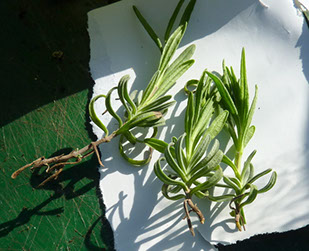
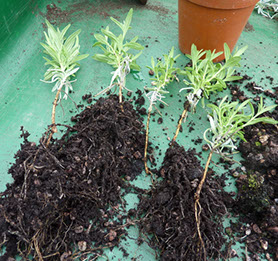
I detach pieces of cutting material by pulling downwards to remove a sprig from the woody stem. Don’t cut pieces off.
You need the heel part at the bottom where the sprig joins the main stem.
Actually this type of cutting is called a heel cutting.
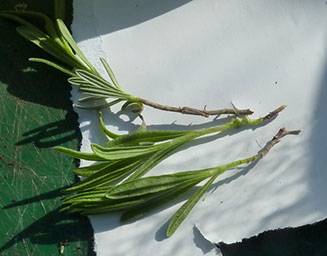
Any straggly bits on the ‘heel’ are trimmed and the bottom leaves stripped so only a few leaves remain at the top of the cutting.
(The cuttings in the first two photographs were taken in spring just to demonstrate the process and so are greener than the actual cuttings shown below.
Despite this I popped them in compost to see whether they would still grow. They did).
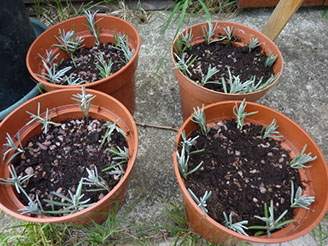
If you prefer you can dip the ends of the cuttings in hormone rooting powder and then push the cutting into the compost so that just the tip is visible. I didn't use rooting powder.
The cuttings are then placed around the edge of the pots which are then left in a cold greenhouse over winter and only given a small amount of water during early autumn when the compost dries out.
Throughout winter no watering is necessary. unless the compost becomes really dry.
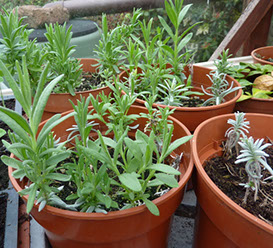
By April it will be easy to tell which of the cuttings have rooted as these will be producing fresh green growth - on the right of the photo you can see some greyish cuttings which weren’t ready for potting on.
Most of the cuttings should have produced really good root systems. These should be potted up individually into small pots again using a gritty compost.
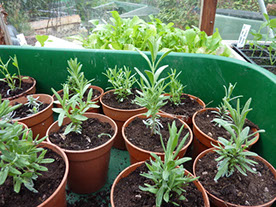
To encourage bushiness the tall growing shoots were trimmed.
I’ll continue to pinch out and new long shoots to try to produce a good shaped plants.
Another way of increasing your stock of lavender plants is to collect seed from your plants. Many of the lavenders in our edging were produced this way before we had so much cutting material. The seed was sprinkled on gritty composts and covered with vermiculite. I can’t remember how long it took for the seeds to germinate but I know a certain amount of patience was required and the resulting plants were fairly variable in both flower colour and plant size. This variation will occur even if all the seed comes from one plant - like mine did.
The seed compost mustn’t dry out completely and sow plenty of seeds as some may fail to germinate.
Regenerating a lavender plant
If a lavender plant becomes bare at the base you can try digging it up and then replanting it so that the bare stems are buried. This way the bare stems should produce roots and can then the old plant be split to produce several new lavenders.
Pruning lavenders.
Lavenders will become leggy and bare at the bottom unless they are regularly pruned.
Once the flowering is over go over the plants with a pair of shears to remove all the spent flower stalks and generally tidy up the plants.
Then in early spring go over the plant again with a pair of shears reducing the height by about a third and also neatening up the shape. This encourages new shoots to grow from lower down.
Don’t cut back to bare stems though.
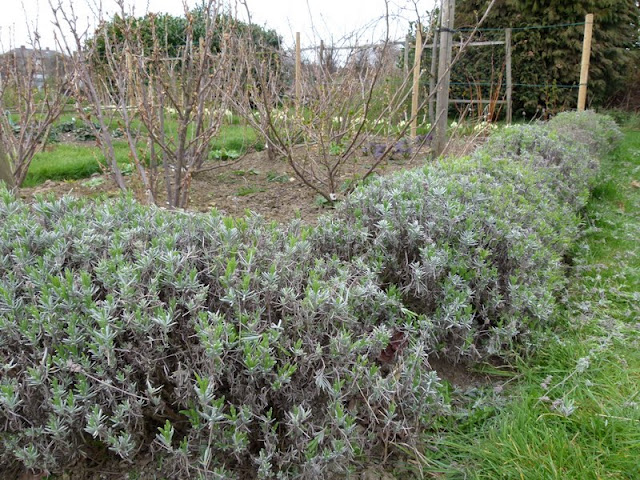
Our lavender hedge has become rather untidy so I am trying to knock it back into shapes as shown in thevideo below.
Our Plot at Green Lane Allotments Blog | A Gardener's Weather Diary | School Vegetable Patch Website
© Our Plot on Green Lane Allotments - Please email me if you wish to use any of this site's content