Saturday 15 November 2014
Waste Not -
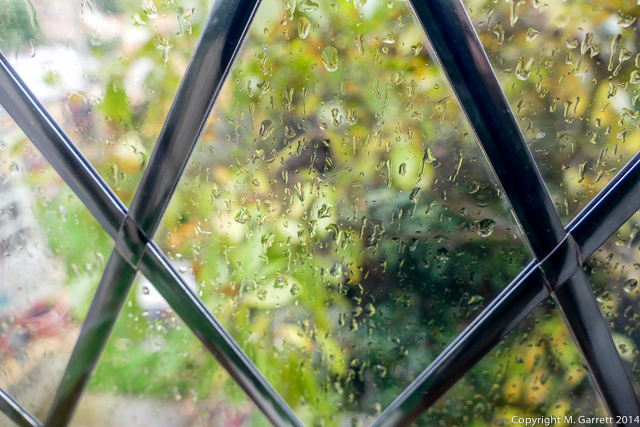
Saturday turned out to be the sort of November day I hate. It was dull, damp and misty for most of the day. It wasn’t the wettest, coldest or dullest day of the month but perhaps it’s just that it continued a succession of dull and dreary days.
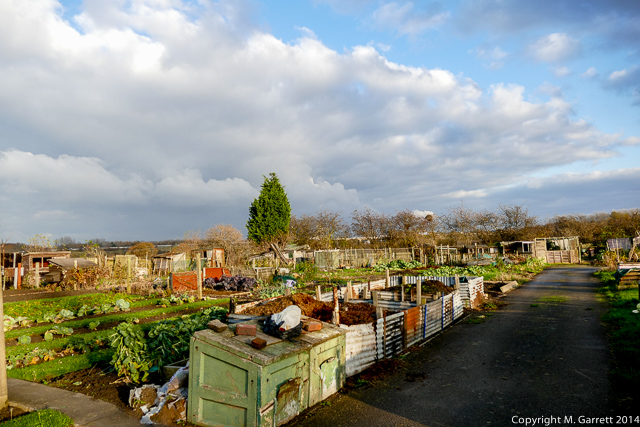
We still haven’t made that trip to the plot for any fresh vegetables. The weather’s put us off but our fresh vegetables are almost used up.
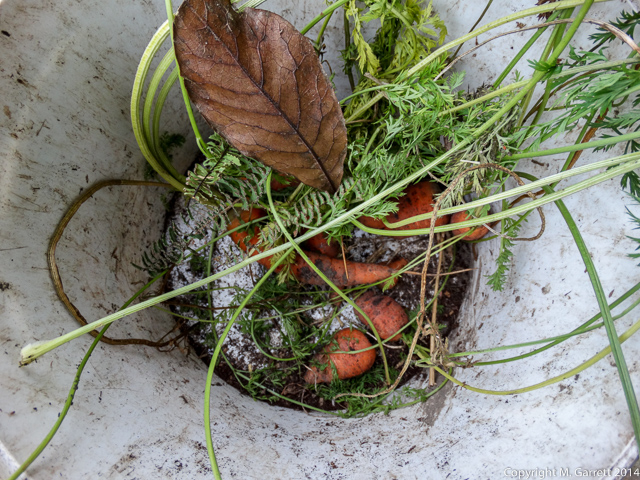
These few carrots left as the “odds and sods” from our last harvesting trip are all we have unless we dip into our freezer supplies. Surprisingly we do have a few “fresh” tomatoes to use up along with a red pepper and some very small green ones.
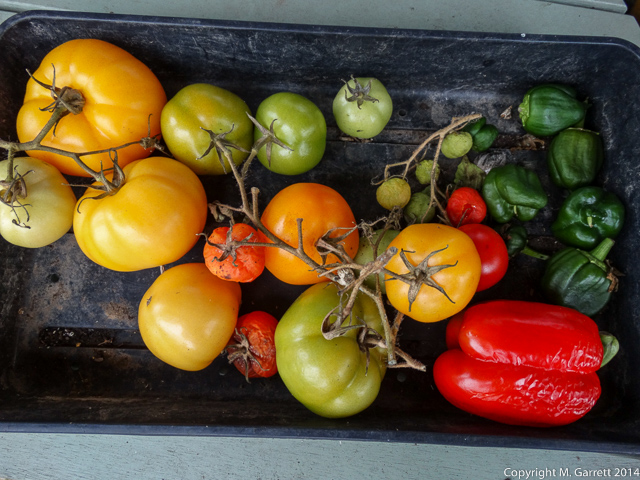
This is all that remains of the left over tomatoes and peppers that I took off our plants when the home greenhouse was cleared back on 15 October. They’ve been left outside on the patio table to ripen under some shelter so at least they’re kept in the dry. The tomatoes are a yellow variety so I’m not expecting them to turn red. I might get a bit of decent red pepper to use too.
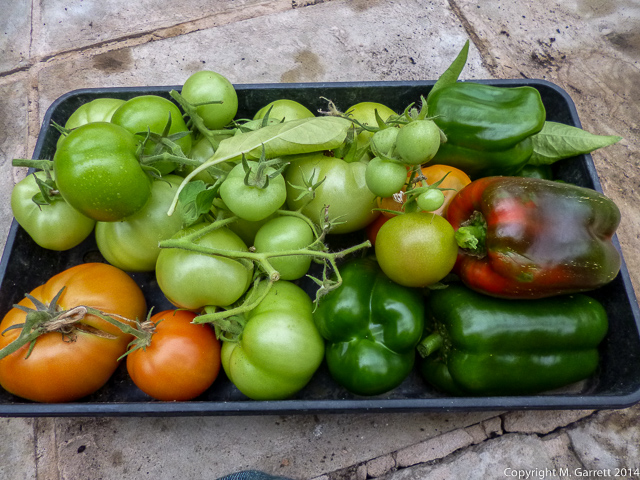
For comparison this is how the collection looked back in October when the greenhouse was cleared. So far nothing that was in the tray has been consigned to the compost heap but it does now look like a few wrinkly tomatoes and peppers might find their way there soon.
Sunday 16 November 2014
Relieving the Drabness
Sunday continued the now settled pattern of dull and dreary weather. It didn’t start raining until into the evening but it continued steadily into the early hours of Monday morning adding another 6.0mm to monthly total which has now reached 37.0mm. That’s about what we might expect this far into November. It’s obviously seemed much wetter to me than it’s actually been.
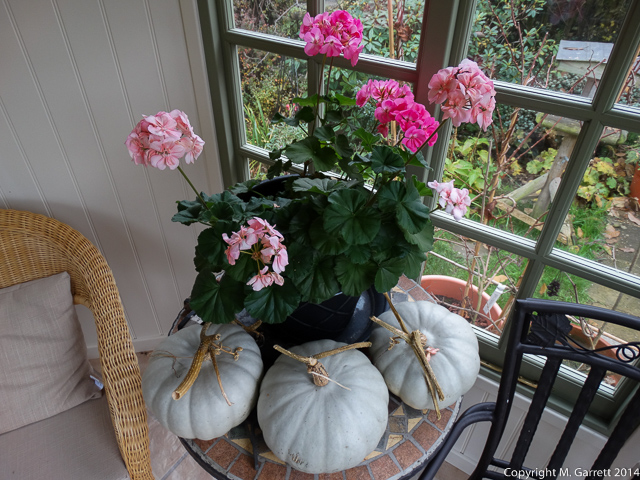
Our geraniums in the summerhouse are still looking very healthy and flowering well surrounded by our winter squash Crown Prince. I might try to fit in making a pumpkin pie this week using one of our squashes.
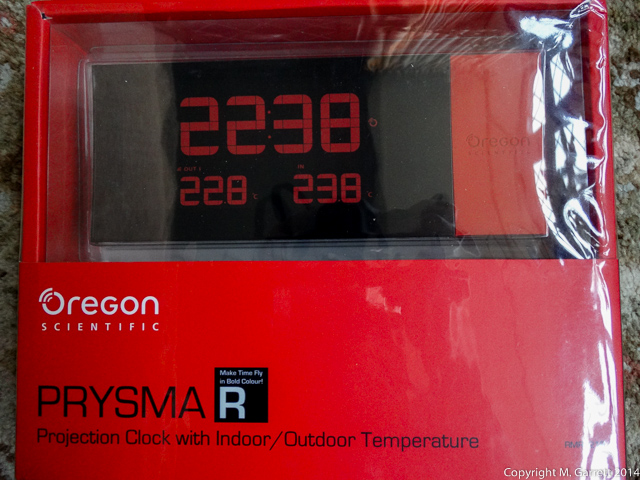
Oregon Scientific
Projection Clock with Indoor / Outdoor Temperature.
A few weeks ago I was asked by Oregon Scientific if I would like to review one of their projection clocks. I thought it would be good to give one a trial and so a few days later my clock arrived.
So as you do I had a look on Oregon Scientific’s web site to see their description of this particular clock. Their description is posted below:
PRYSMA Projection Clock
Add touch of style to your home with new PRYSMA Series of multifunctional and innovative projection clocks!
Combining contrasting textures in a sleek slim-
Warm or cold, inside and out? The PRYSMA Projection Clock also measures both indoor and outdoor temperature and includes a remote sensor to place outdoors, so you know how cold or warm it is without even leaving your bed!
A dual alarm function allows you to set two alarms time on a single clock, one for you and one for your partner, and with a crescendo alarm with 8-
Delivery & Packaging
The despatch and delivery of the clock was very efficient. Like most things these days it came well packaged for its journey in the postal system and arrived in good condition and undamaged.
In the package are the clock, power adaptor, an outdoor temperature sensor, instructions and a couple of batteries for the sensor. The system operates wirelessly so there aren't any wires to connect up for the outdoor sensor.
Setting Up
I only had a quick look through the instructions and there didn’t seem to be anything very complicated to setting up the equipment. It’s suggested that for optimum results the clock should be placed away from any computers and microwaves to avoid signal interference.
The mains adaptor was plugged into a spare socket in the bedroom and once connected the clock burst into life with a time showing 00:00. The two batteries were fitted into the sensor and the tiny reset button on the sensor was pressed. It didn’t take more than a few seconds for the wireless connection to be made and the temperature appeared on the clock screen. At this stage the clock was showing a few minutes had elapsed as the time showed 00:04. Another quick scan of the instructions confirmed that the clock time should set itself to the correct time from a radio signal but that this would normally take between 2 and 10 minutes. The instructions suggest that if this signal is weak this process might take up to 24 hours.
I decided that a watched clock was never going to set the time quickly and left it to do its own thing for a little while. It was about half an hour later when I checked the clock and the time indeed had updated and was now showing the correct time and date.
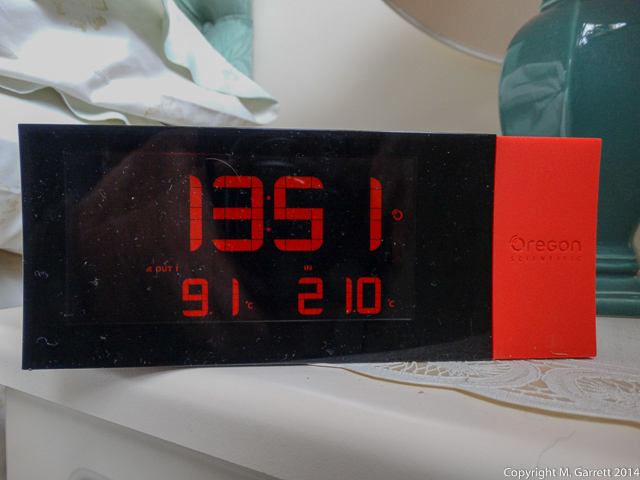
The above photos shows the clock set up displaying the time and the temperature registered by the remote sensor and the indoor temperature. I’ve chosen °C but the option is available to show the temperatures in °F if you prefer.
Positioning the Outdoor Sensor
After getting the clock up and running the next decision to be made was where to put the outdoor sensor. The recommendation is that it should be placed outside not more than 1.5m high shielded from direct sunlight and wet conditions. This was a bit of a dilemma for me as I already have a fully functioning weather station measuring and recording outdoor temperatures and rainfall. My weather station also has an extra remote sensor measuring the temperature in my greenhouse.
After a bit of thought I decided it would be useful to monitor the temperature inside our summerhouse too. We store a few vegetables and frost tender plants in there through winter. There’s no heating in the summer house so in the winter I suspect it gets pretty cold. It would also keep the sensor dry. It’s been positioned just inside the doorway on the floor so it will be measuring the temperature at winter squash level.
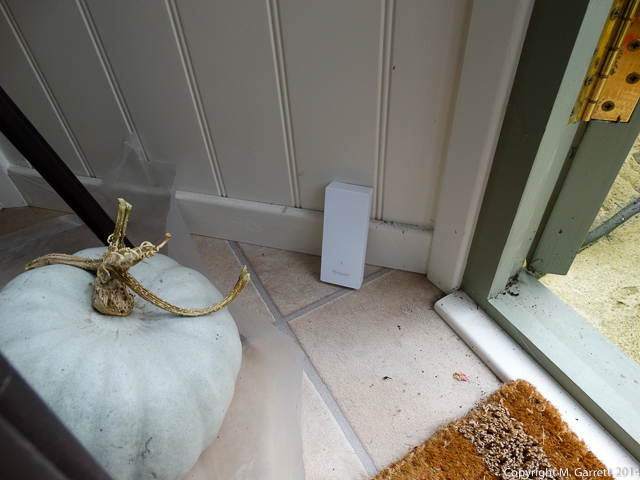

I should note here that this equipment is primarily a clock with a remote temperature sensor and doesn’t substitute for a weather station. It displays the outdoor temperature but doesn’t store that information or download it to a computer. However if you’re looking for something that gives an indication of the temperature in a garage, greenhouse or other outdoor building this might be just what you are looking for. The remote sensor is supposed to work up to a range of 50m depending very much on the obstacles in between the sensor and the clock. The clock can work with up to 5 remote sensors although only one sensor is supplied with the clock.
Projecting Time & Temperature
It you’re still wondering why this is called a projection clock, as I have to admit I hadn’t come across this term before, it’s because it will project the time and outdoor temperature onto a ceiling or wall.
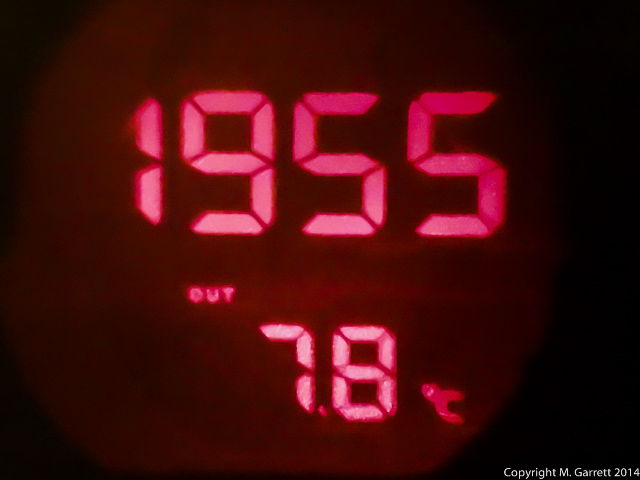
So in a darkened room this is what you will see on the ceiling with the projection function working. It’s possible to adjust the direction of the projection and flip it through 180° so you should be able to find a suitable area of ceiling or wall for the projected image. I have to admit it isn’t as bright as the picture I took suggests and if left projected onto the ceiling it won’t light up the room or keep you awake at night if it’s located in a bedroom.
The clock comes with a couple of alarms which have an 8 minute snooze button which can be repeated three times. I haven’t tested the alarm.
The Verdict
This clock might be just the thing for you if you’re in the market for a new alarm clock or fancy a change to something a little bit different to wake you up in the morning. The clock picks up the time from a radio frequency and so should always be accurate and is able to monitor a temperature in a remote location. I notice that this clock is also available with a few extra bells and whistles too if you fancy a few extras like adding a weather forecast or even incorporating a radio.
Would I buy one is a bit of a tricky questions as being retired I’m not really in need of the alarm function but I have to admit that after a week of waking up in the morning to a quick glance at the ceiling to find out the time and outdoor temperature I’d miss it if it had to be returned.
From an aesthetic point of view I would have preferred a more neutral colour or the black option as the orange surround doesn’t fit in with our décor. Others colours are available but unfortunately we were sent the orange version.

Monday 17 November 2014
A Little Bit Brighter?
Monday was a little bit brighter than the weekend. The overnight rain cleared away and although we had a few showers through the day these didn’t amount to an awful lot of rain. The sun almost managed to break through in the afternoon.
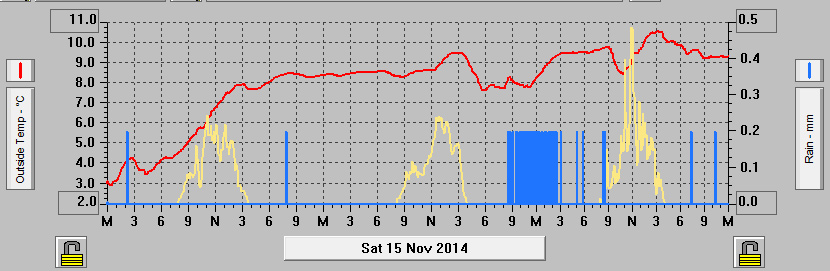
Temperature, Rainfall and Sunshine Records from Saturday 15 to Monday 17 November 2014
I did have a quick check on our plants over wintering in the greenhouse. Protected from the miserable damp conditions they’re doing fine in the greenhouse so far.
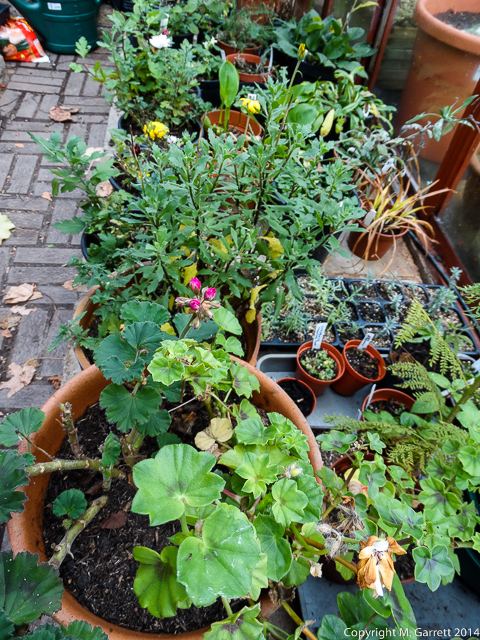
I checked to see if any of our collection needed a drop of water. They were a little bit on the dry side but I think that they’ll have a better chance of surviving a cold frosty snap if they’re kept on the dry side rather than a little too wet. Even in the greenhouse at this time of year plants don’t dry out very quickly so over watering is to be avoided if at all possible. I’ve fleece at the ready should any frost be forecast.

It might be my imagination but I don’t think it is but Sue’s had cyclamen in constant flower in the greenhouse since early spring. They’re still putting on an excellent display. Like the rest of the greenhouse plants these get watered with extreme care at this time of year.
Tuesday 18 November 2014
A Bit On the Messy Side
Tuesday was forecast to be a bit brighter. To be honest it wasn’t going to have to be all that much of an improvement to be better than the last few days. It didn’t get off to a very good start.
It seemed like we got the only shower that was about in Northern England. Once that passed it was a little bit brighter and after lunch we decided that the trip to the plot to harvest some vegetables couldn’t be put off any longer.
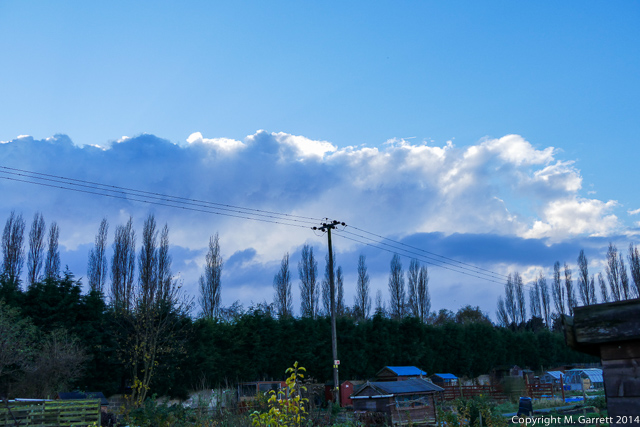
First job was to dig some carrots, parsnips and leeks. It was sort of sunny when we arrived at the plot but the sky didn’t give me much confidence that it was going to stay that way. I wasn’t too sure which direction the weather was coming from. This was looking east.
And looking west wasn’t too promising either.
We were under a patch of blue so I got on harvesting some vegetables. It’s so much easier to buy your veggies at the greengrocers at this time of year. The tops of the vegetables are wet, soil is wet and doesn’t want to part company with carrots parsnips or leeks. Everything comes up covered in soil.

I’d hate to start trying to clean these vegetables at home so there was nothing to it other than get a bucket of cold water and give them a wash on the plot. Normally I try to avoid washing freshly harvested vegetables as I think it reduces their keeping qualities but in these cases I was prepared to make an exception.

As it happens they scrubbed up rather well. I did have to consign a few carrots straight to the compost heap as some had split and others had some slug damage. The couple of parsnips are only for a tester to see if the roots are sweet enough to harvest. They’re supposed to need a frost to sweeten them but I’m hoping these two will be good to eat without a “frosting”
Wednesday & Thursday 19/20 November 2014
Not a Westerly and Is Spring Here Already?
Wednesday and Thursday both had spells during the day that weren’t too bad but in generally they followed the now well established weather pattern of dull and mild weather.
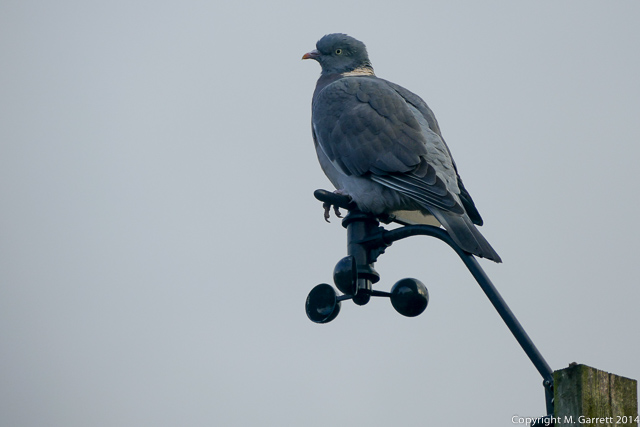
I bet the Met Office don’t have this problem. One of our regular wood pigeons has taken up a vantage position on the top of my weather vane. Not for the first time I might add. I think he or she prefers it if the wind vane indicates a westerly wind direction and “Woody” arranges the vane accordingly even if the wind is from the east.
Whilst I was having a quick mooch around the garden as I filled up the bird seed feeders for the likes of Woody I couldn’t help but notice the first few spring bulbs are breaking through the soil surface.
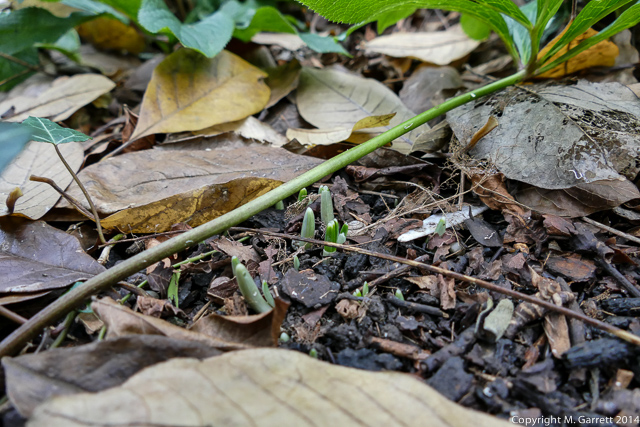
I’d image they’re usually covered in fallen magnolia leaves for most of the time but the blackbirds are constantly rummaging through the leaves for any insect life and have left these shoots uncovered. I wonder if these bulbs are normally pushing their shoots up by the end of November?
Friday 21 November 2014
Squashed Out
Friday didn’t continue the theme of slightly brighter days and the really dull dismal November weather returned. It started to rain in the middle of the afternoon and continued into the night.
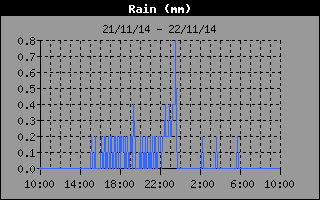
Any lingering doubts I had at the back of my mind about doing a little bit more autumn digging on the plot can now be discarded as Friday’s rainfall of 13.0mm will certainly mean the soil is too wet to dig.
I did manage to use up the first of our stored Crown Prince squashes.
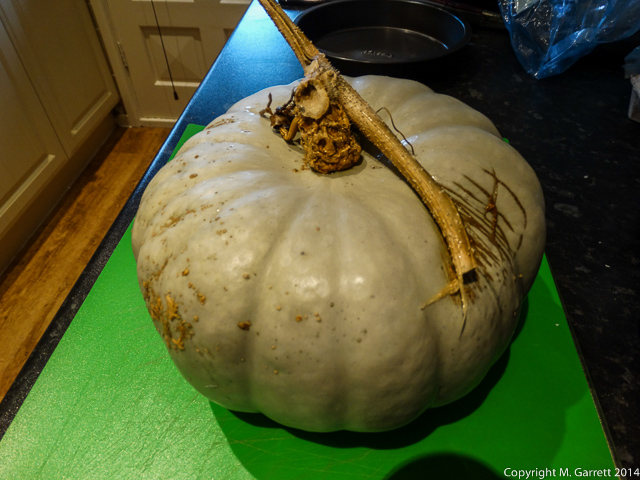
It was certainly a bit of a beast to get into. I think a good clean saw would be the easiest way to cut one of these in half but whilst I have a saw I wouldn’t want to use it on something I was going to eat. After lots of effort with a large knife I managed to cut the squash into two so that the seeds could be removed before cooking the squash.

My plan was to make a pumpkin pie following this recipe on the BBC Food Recipes web page.

I decided to cook the squash first and see just how much weight of prepared squash flesh I would get out of my Crown Prince. Once cooked I measured out the 450gms required for my pumpkin pie and that left me with another 800gms of squash to use. I decided to freeze 450gms, enough to use in another pumpkin pie, and the remaining amount was added to a stew as a thickener.

The pumpkin pie turned out looking well as shown above but before we gave it the taste test I realised that I hadn’t added any sugar to the pie. Fortunately it wasn’t the disaster I thought it would be and despite its lack of sugar the pie tasted pretty good. The squash is on the sweet side to start with and there’s the addition of a few spices so the sugar wasn’t missed too much. Making the pie again I might not add the full 75gms of sugar recommended in the recipe in any case.